
Console Setup Guide
Operator Training & Safety Basics
Setting up your control room console correctly is the key to operator comfort, performance, and safety in 24/7 environments. This step-by-step guide covers everything about console setup, including operator training, safety basics, and ergonomic adjustments aligned with ISO 11064 ergonomic standards. You’ll learn how to adjust sit-stand heights, fine-tune monitor ergonomics, configure operator chairs, and make the most of Tresco’s integrated features like cable management and the Personal Environment Unit (PEU).
Operator Training & Safety Basics
Before operating a control room console, every operator should complete training that emphasizes both functionality and safety. Key steps include:
- Reviewing console features, adjustment controls, and sit-stand settings.
- Testing the Personal Environment Unit (PEU) for airflow, heating, and USB power (when the console is equipped with one).
- Ensuring cables are properly routed and no tripping hazards exist.
- Clearing the worksurface for distraction-free operation.
These safety basics set the foundation for efficient, fatigue-free console use.
Setting Control Room Console Height (Sit-Stand)
Setting the worksurface at the proper height helps prevent fatigue, protects posture, and maintains comfort through long shifts. Follow the points below to configure your sit-stand console. For actuator operation instructions, refer to the video in the personal environment unit section.
Sitting Position
- Adjust chair height so feet rest flat on the floor or on a footrest.
- Set worksurface height so elbows form a 90–100° angle with shoulders relaxed.
- Keep forearms parallel to the floor, wrists straight, and hands level with the keyboard.
- Position the monitor so the top edge is at or just below eye level.
- Maintain a small gap (2–3 fingers) between the back of the knees and the chair seat.
Standing Position
- Raise the console worksurface so elbows are at 90–100° with forearms parallel to the floor.
- Stand upright with weight evenly distributed across both feet.
- Use an anti-fatigue mat to reduce pressure on knees and lower back.
- Keep wrists neutral, not bent upward, when typing or using input devices.
- Adjust monitor height so the center of the screen is 15–20° below horizontal eye level, reducing neck strain.
Posture Rotation
- Switch between sitting and standing every 30–45 minutes.
- Avoid leaning on one hip or locking knees when standing.
- Take short stretch breaks to reset posture and circulation.
- Pro Tip: Save one preset for sitting and one for standing in the console memory. This makes daily adjustment fast and consistent, even in shared workstations.
Tresco’s sit-stand consoles make console setup quick and ergonomic, ensuring compliance with ISO 11064-4 (layout and dimensions of workstations) as well as ISO 11064-7(principles for the evaluation of control centers).
Monitor Ergonomics: Distance & Angles
Operators spend most of their time focused on screens. Proper setup prevents strain:
- Place the top edge of the display at or slightly below eye level.
- Position monitors about an arm’s length away.
- Tilt displays 10–20° backward for natural sightlines.
- Center your primary screen to avoid constant neck rotation.
Adjustable monitor arms make fine-tuning fast and keep sightlines clear for video walls. Information taken from ISO 11064-5(Dispalys and controls) and ISO 11064-6(environmental requirements for control centers)
Operator Comfort: Chairs, Footrests & Reach Zones
A properly configured workstation keeps operators alert during long shifts:
- Chair: Adjust height so knees are ~90° with feet fully supported.
- Footrest: Use when feet don’t reach the floor comfortably.
- Lumbar support: Maintain the spine’s natural curve.
- Reach zones: Keep high-use items (keyboard, mouse, radios) close; secondary tools can sit further back.
This ensures lasting comfort and reduces fatigue across 24/7 operations. Information taken from ISO 11064-4 (layout and dimensions of workstations)
Lighting, Acoustics & Personal Environment Unit (PEU)
The right environment improves focus and operator wellbeing:
- Use indirect ambient lighting to minimize glare.
- Add task lighting for detailed work.
- Control background noise with acoustic treatments.
- Set the PEU airflow and heating at moderate levels to avoid dryness or drowsiness.
- Keep cables routed neatly through grommets and USB ports.
Ergonomic console setup balances environment, lighting, and personal comfort. Information taken from ISO 11064-6(environmental requirements for control centers)
If your console is equipped with a personal environment unit, then you have access to the highest level of ergonomic comfort at the tip of your fingers. Let’s explore how to operate the system in the following video. We left out a couple of helpful links if you want to jump to specific features of the Tresco Personal Environment System.
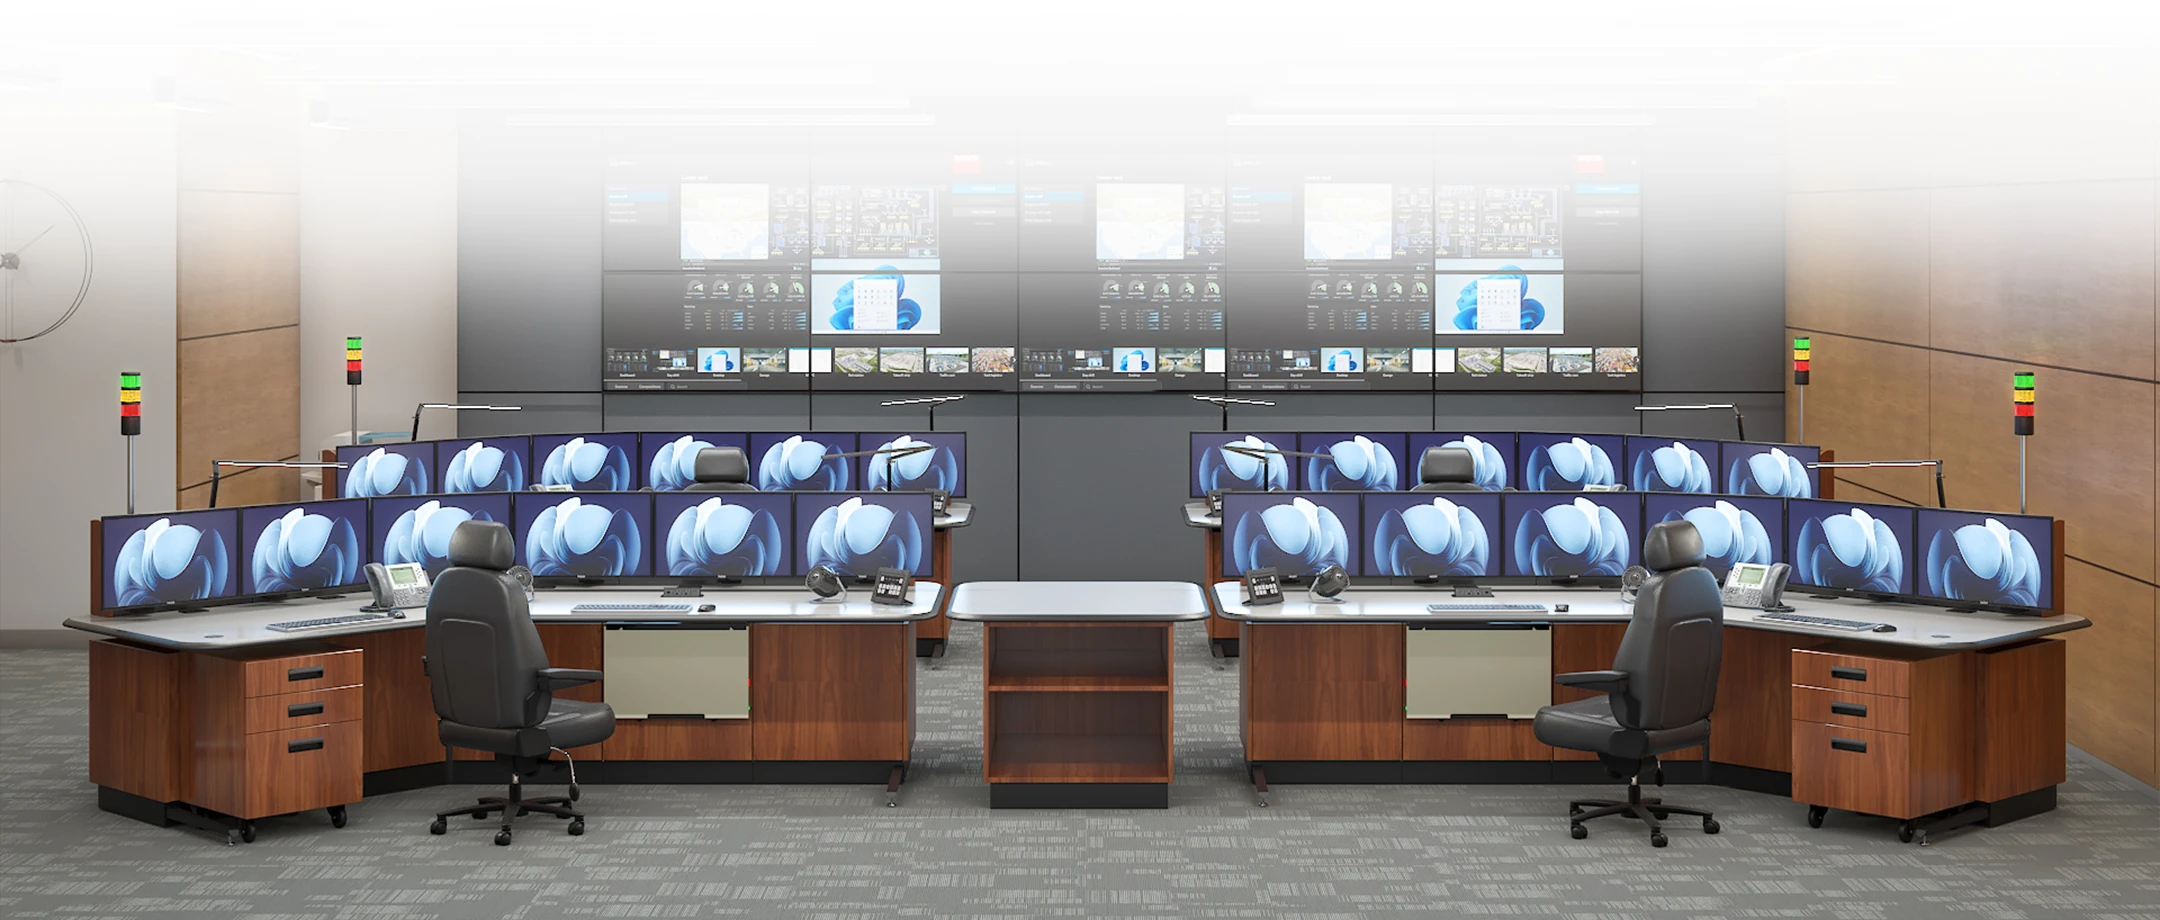
Common Control Room Layouts That Work
Control rooms generally fall into two primary layout types: focused single-operator pods and collaborative multi-operator pods. Each calls for a console tailored to its purpose.
Single-Operator Focused Work Pods
- VANGUARD
Our flagship console, engineered for operator immersion with advanced ergonomics like a motorized backwall system that independently adjusts monitor height from the worksurface. This allows precise control of multi-level displays and supports peak focus in high-demand environments. - AEGIS
Also suitable for single-operator pods when speed is a priority. Its curated configurations and fast lead times make it ideal for security and SOC environments that require quick deployment without sacrificing ergonomics.
Collaborative Team Pods
- NEXUS
A modular line designed for flexibility. Straight, curved, or wraparound layouts enable seamless collaboration while maintaining ISO 11064 ergonomic standards. NEXUS adapts to the team’s workflow and supports highly specific configurations. - AEGIS
Fits here too, delivering value with fast quoting, faster manufacturing, and streamlined configurations, ideal when collaborative setups are needed quickly.
Whether small or large, proper console setup ensures both efficiency and operator comfort. While each console line provides a clear pathway, VANGUARD for focused immersion, NEXUS for collaboration, AEGIS for speed and efficiency, Tresco also offers extensive customization. Clients can combine features across product lines to create hybrid setups that address the unique demands of their operations.


Troubleshooting Comfort & Ergonomic Issues
Even with proper setup, operators may encounter discomfort during long shifts. ISO 11064 provides clear ergonomic guidance. Here are common issues and quick fixes:
- Back pain? Adjust chair height, lumbar support, or add a footrest to maintain neutral spine posture.
- Neck strain? Lower monitor height so the top edge is at or slightly below eye level; reduce neck rotation by centering primary screens.
- Eye fatigue or headaches? Increase monitor distance to ~arm’s length; reduce glare with indirect lighting or anti-glare filters.
- Shoulder or wrist discomfort? Ensure elbows rest at ~90° with relaxed shoulders; adjust keyboard/mouse height so wrists remain straight.
- Leg circulation issues? Keep knees at ~90° with feet flat; use a footrest if needed; alternate sit-stand positions regularly.
- Distractions from noise or heat? Use acoustic treatments to reduce background noise; adjust PEU airflow/temperature to avoid overheating or dryness.
- Fatigue over long shifts? Follow a posture-rotation schedule (switch between sitting and standing every 30–45 minutes); take micro-breaks to stretch and refocus.
- Glare from video walls or lighting? Reposition displays and adjust ambient lighting to eliminate reflective hotspots.
Addressing small issues early prevents long-term fatigue and injury.
Downloadable Operator Setup Checklist (PDF)
Need a quick reference during your shift? Download our Operator Setup Checklist for step-by-step console setup reminders covering sit-stand adjustment, monitor ergonomics, chair support, and PEU usage.
Understanding your Console
Let’s analyze the various components of our console to understand their purpose and how they integrate. This will help you use the console’s features more effectively, customize your control room operations, and improve operator efficiency.
FAQ
-
How often should I switch between sitting and standing at my console?
For best results, alternate every 30–45 minutes. This reduces fatigue, improves circulation, and helps maintain focus during long shifts.
-
What is the ideal monitor setup for reducing neck and eye strain?
Keep monitors at arm’s length, with the top edge of the primary display at or slightly below eye level. Center the main screen to avoid constant neck rotation.
-
What should I do if I feel back pain after a few hours?
Check that your chair height allows knees at ~90° with feet supported. Adjust lumbar support or add a footrest to maintain natural spine alignment.
-
How can I manage glare and lighting in the control room?
Use indirect ambient lighting to reduce glare on monitors. Add task lighting for documents, and reposition screens if reflections are an issue.
-
How do I use the PEU to stay comfortable?
Set airflow at a gentle level to avoid dryness, use heating in short bursts to stay alert, and adjust white noise or lighting features to reduce distractions.
-
What are the most important safety basics to check before starting a shift?
Ensure the console sit-stand function is working, PEU settings are adjusted, cables are routed safely, and the worksurface is clear of clutter.
-
Can I personalize console setup if I share a workstation with others?
Yes. Save your preferred sit-stand heights, monitor angles, and chair adjustments. All our consoles (AEGIS, NEXUS, and VANGUARD) allow quick recall of presets for different operators when specified with a personal environment unit.
